How to Create Your First TrafficCreator Campaign
To create your first campaign, start a new project — Create project on the Campaigns page, or New Project in the Dashboard's Command Center — then enter your campaign name and target URL, choose a traffic quality tier, add your GA4 Measurement ID, set targeting and duration, and launch. Traffic typically begins within 5-15 minutes. The Measurement ID is required for visitor traffic — without it the campaign will not start.
Video Walkthrough#
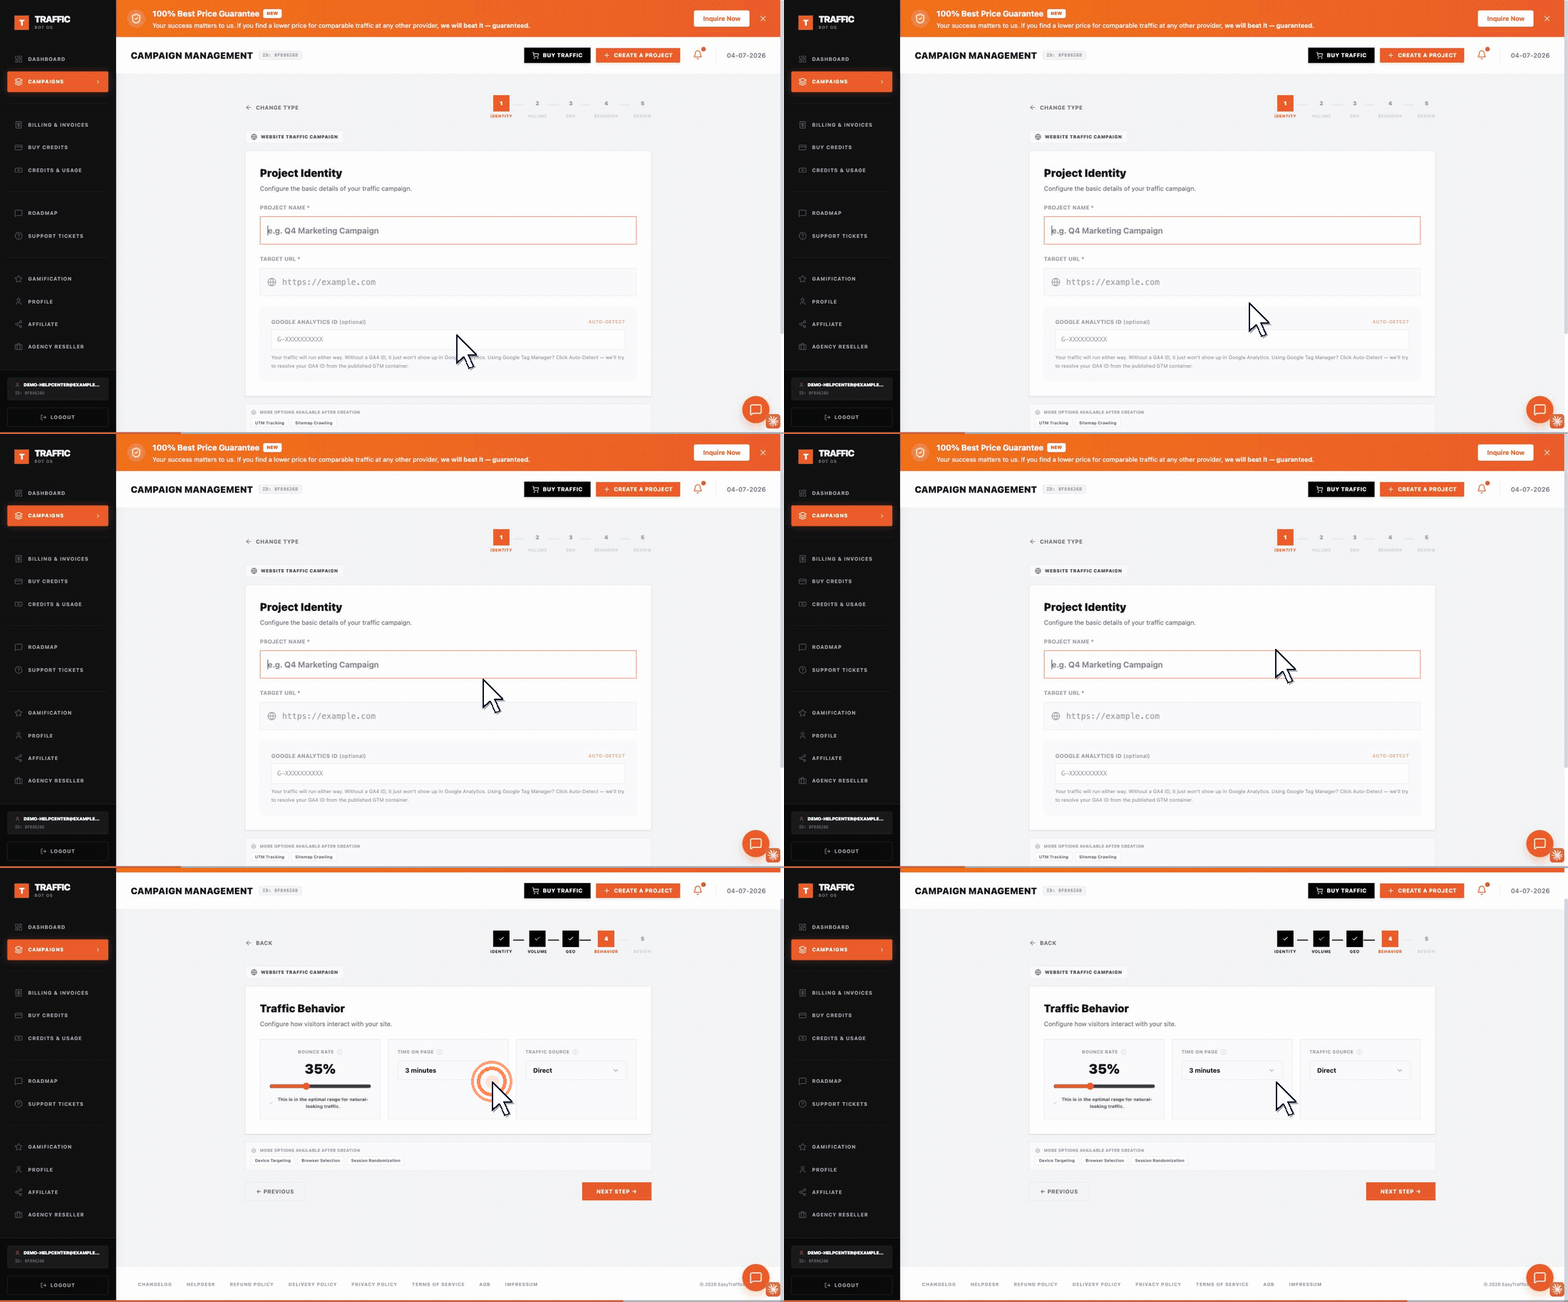
The wizard has five steps — Identity → Volume → Geo → Behavior → Review. The walkthrough shows the first step, where you name the project and enter your target URL, and the Behavior step, where you set bounce rate, time on page, and traffic source. Use Next Step at the bottom right to move between them.
Before You Start#
- An account balance in at least one tier: Professional, Expert, or SEO (GSC/Local). Economy is only available if your account already holds legacy Economy credits.
- Your target URL, ready to receive traffic (no login wall on the landing page).
- A GA4 Measurement ID for the target site. Required on Economy, Professional and Expert — the campaign cannot start without one. Only GSC and Local SEO campaigns are exempt.
Steps#
- Start a new project. Open Campaigns and click + Create project (top right). From the Dashboard you can also use the New Project tile in the Command Center.
- Choose the campaign type. The first screen asks what you are buying: Website traffic (visitors that show up in GA4), Google Search Console (real SERP clicks for a keyword), or Local SEO (Google Maps / Business Profile engagement). Each draws from its own wallet. Pick one and click Continue.
- Enter a campaign name. The field is Campaign name — use something you'll recognize later, e.g. "Q4 Marketing Campaign."
- Enter your URL. The label depends on the type you picked: Website URL for website traffic, Ranked page URL for Search Console, Google Maps URL for Local SEO.
- Select a traffic quality tier.
- Expert — residential IPs, city-level targeting, natural GA4 events, day/night volume variation, and website-aware crawling.
- Professional — residential IPs, standard targeting.
- Economy — datacenter IPs, basic features; legacy accounts only, not available for new purchases.
- GSC / Local SEO — keyword-driven traffic that draws from your SEO balance instead of a visitor tier.
Each tier draws from its own separate balance. If a tier is disabled in the picker, your account has no balance in that tier yet.
- Add your GA4 Measurement ID — required for visitor traffic. Enter an ID in the form
G-followed by exactly 10 characters (e.g.G-XXXXXXXXXX). If you only have a Google Tag Manager container ID (GTM-...), use the Detect ID button next to the field — it can usually resolve the GA4 ID from your GTM container automatically. (On an existing project's settings page the same button is labelled Auto Detect.)
> Do not skip this. On the Economy, Professional and Expert tiers a campaign cannot start without a valid Measurement ID. If you leave it empty the project is created but parks in a pending_ga state with the reason "Missing valid GA4 Measurement ID" and delivers nothing — your dashboard shows Finish setup instead of active. Only GSC / Local SEO campaigns are exempt, because they are measured in Search Console rather than GA4.
- Set targeting. Choose target countries and, on Expert, specific cities. Leave broad if you have no preference.
- Set duration and volume. Choose a fixed number of days or leave it running until you pause it or your balance runs out. Check the available balance shown for your selected tier before confirming.
- Confirm and launch. Review your settings and submit. Your project appears on the dashboard immediately in a starting state.
Check Your Setup#
- The project status shows active on your dashboard within a few minutes of launch.
- If you added a GA4 Measurement ID, check GA4 Realtime reports for incoming activity shortly after launch.
- The available balance for your selected tier decreases as hits are delivered — this confirms traffic is being drawn from the correct balance.
Troubleshooting#
| Problem | What to check |
|---|---|
| Tier is greyed out in the picker | Your account has no balance in that tier. Add funds or pick a tier you already hold credits in. |
| Project sits at pending_ga / dashboard says Finish setup | No valid GA4 Measurement ID is saved. Add one — visitor tiers cannot deliver without it. |
| GA4 ID rejected with a GTM-/UA- error | Use a GA4 Measurement ID starting with G-, or click Auto-Detect to resolve it from your GTM container. |
| GA4 ID looks right but is still rejected | The format is strict: G- plus exactly 10 letters/digits. Extra spaces or a trailing character will fail validation. |
Entered G-XXXXXXXXXX and it was rejected | That's the placeholder shown in examples, and it is deliberately refused. Use your own Measurement ID from GA4. |
| "Insufficient balance" error on launch | The visitor count you set exceeds your available balance for that tier. Lower the volume or add funds. |
| Project stuck in a non-active state after several minutes | See Understand project status. |
| No activity in GA4 after launch | See Why traffic is not showing in GA4 realtime. |